Pumpkin Bread recipe

I was going to write a rant about how everywhere you look on social media, the changing of seasons from summer into fall, and even the calendar change from August to September automatically brings the onslaught of [Starbucks] Pumpkin Spice Latte!

Doesn’t even have to be a latte to be honest.

You just breathe the letters PSL and the words pumpkin and spice automatically follow for no good reason.

Anyhow, I’m not going to go on with my whole dislike for PSL obsessions that are plastered everywhere, I’m just going to give you the recipe for a Pumpkin Loaf  I made last night because I was craving a nice slice of pumpkin bread to go with a hot cup of tea. Plus I saw the sad & neglected bag of leftover pureed kabocha squash still sitting in the freezer. Originally the squash was destined to become soft & pillow-y gnudi that I had once made eons ago with acorn squash, but goodness they are a ton of work to make… and my god, they were amazing.

Anyhow, I’m getting distracted again…

The original recipe, “World’s Best Pumpkin Bread” is from the website TheFrugalGirls.com, I found via Pinterest. I made the recipe as stated, but it could use these changes to reflect my own tastes:

  • Could use some more added spice. I used: 1 tsp ground ginger + 1 tsp cinnamon + 1 tsp fresh ground nutmeg+ 1/4 tsp ground cloves
  • I really wish I had used brown sugar like I originally was considering instead of the white sugar stated in the recipe. It really does make a huge difference in flavour. (And sometimes it really pays to go with your instincts!)
  • I would cut back on the oil a bit, I don’t like that it feels so oily when you pick it up to eat with your fingers. Would have to experiment, but I think 2/3 cup would be more than enough fat, possibly even push it 1/2 cup.
  • Definitely does not need any frosting, glaze or icing as this loaf is incredibly moist (see #3) and flavourful (see #1 + #2) as is — but that’s totally personal opinion on my part since I’m never really keen on the stuff anyways ^_^

As a side note: The thing I love most about pumpkin breads in general, is that you can use pretty much any kind of winter squash interchangeably for regular old canned pumpkin. Some people may argue with me, but I think it’s just nice to put that thought out there for people who may not have considered the idea and might be stuck without any canned pumpkin on-hand, which is always a possibility in my kitchen. That’s the nice thing about having a winter squash always hanging around on the counter top because you didn’t know what to do with it, or maybe you got tired of cooking it as a regular old vegetable.

Alrighty, so here’s my version of the recipe, including all the changes I would make from the list above.


Pumpkin bread still warm from the oven!
 
Pumpkin Loaf

2 cups pureed pumpkin
3 cups brown sugar
2/3 cup oil
2/3 cup water
4 eggs
3⅓ cups flour
2 tsp baking soda
1 1/2 tsp salt
1 tsp cinnamon
1 tsp ground nutmeg
1 tsp ground ginger
1/4 tsp ground cloves

Preheat oven to 350F
Mix pumpkin, sugar, oil, water & eggs in large mixing bowl until well combined.
In medium mixing bowl, stir to combine flour, baking soda, salt, cinnamon, nutmeg, ginger & cloves
Gradually pour dry ingredients into pumpkin mixture. Stir well to combine.
Generously grease and flour 2 loaf pans.
Divide mixture evenly into each pan.
Bake @350F for 45 – 55 minutes, or until cake tester comes out clean.
Crumbly crumbles

Ever since we started getting our weekly groceries delivered from Spud.ca back when our CSA finished for the year, I’ve been making sure to include whatever fruit that’s in season — something we don’t get much of with our CSA.

It’s interesting, I have never been a huge fruit fan, I much prefer veggies, but this year I’ve probably consumed more fruit in the last three months than I have… Well… To be honest: Ever.

Until now, I hadn’t actually taken stock of the quantities I order with our weekly delivery and it’s actually a fair amount to consume before the next week’s order arrives. Since we’re currently in winter mode, this is what we’ve been getting: 3lb box of mandarin oranges, 2lb bag of mixed pears, 3 kiwis (this is what usually constitutes a single “count” when ordering small fruit), and sometimes 3 apples (unless I’m ordering apples for baking, the I’ll order a 3lb bag).

With the exception of the apples, I have discovered that all the fruit has to be consumed within the week or they’ll be lost. The surprisingly great thing about our Spud deliveries is that our fruit’s been arriving at the perfect ripeness for eating but of course doesn’t have a very long window for enjoyment so I’ve had to come up with a reliable recipe I can use across the board for all my fruit just to extend their “eatability” and not throw them into the garbage bin.

Enter fruit crumbles, stage left!

It turns out that I don’t like fruit crisps, but I really, really, like fruit crumbles and with that thought in mind, I wanted to find a recipe that could be easily be customized or doctored up to my heart’s content. This recipe, I discovered, is supremely easy to wing using whatever fruit you happen to have onhand. I really like that this recipe, even though it has measurements, doesn’t actually require anything resembling proper measuring accuracy. At least, I certainly don’t much bother when I make it — I’ve been tossing in a little handful of this, a few heaped spoonfuls of that, as well as a little bit of that over there and whatever else happens to pique my interest of the moment.

My current flight of fancy happens to include all the pears we keep getting, along with a bit of candied crystalized ginger chips, plus some raisins for The Hubbs, and the usual spice suspects. But like I said, whatever you’re keen on works perfectly fine, so have at it!

The recipe that I’m going to include below is going to be really messy to read as I will be giving the basic, loose “template” based on my current use of pears, so if you’re not keen on, let’s say, the ginger chips, just substitute with something you prefer or else ignore the ingredient(s) entirely. As for the topping, the ingredients are easily scaled up or down as needed depending on the amount of fruit, or size of baking pan, you’re using.

As a loose guideline for determining how much sugar, lemon juice and cornstarch to use in your recipe:
* Use more sugar and less lemon juice when cooking with tart fruits
* Use less sugar but more lemon juice for sweet fruits — taste a piece of fruit to adjust everything to taste.
* Use more cornstarch with very juicy fruits and less with firm fruits.

Pear Crumble (aka Your Favourite Fruit Crumble)

Pears (or chopped fruit of choice), enough to fill pan about two-thirds full
1/2 cup sugar, to taste
lemon juice, to taste
1-3 Tbsp cornstarch, depending on juiciness of fruit
cinnamon, nutmeg, other fave spices, to taste
couple handfuls, each: crystalized ginger chips, raisins, walnuts, etc…

Crumble Topping:
1 cup whole wheat flour
1 generous tsp baking powder (if using whole wheat, otherwise use level teaspoon)
cinnamon & nutmeg, to taste (optional)
1/4 tsp salt
1/2 cup brown sugar
1/2 cup butter, softened

Preheat oven to 375°F.

In a bowl, add your fruit with the sugar, lemon juice, cornstarch, spices and ginger chips, raisins & nuts, if using, stirring well to combine.
Pour filling into your baking dish of choice.
In a smaller bowl, combine all the dry topping ingredients together and mix well. Add the butter and use your fingers to squish it in with the flour, just until you have assorted sized butter chunks.
Pour the crumble topping evenly over the fruit and bake for 30-35 mins until the fruit bubbles around edges of the pan and the topping is nicely browned and firm to the touch.
Let crumble cool to room temperature before serving so the fruit has time to set up.
Enjoy with vanilla ice cream!

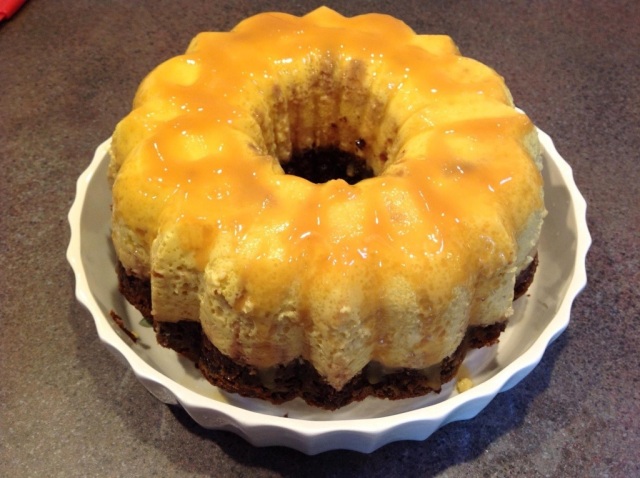
Magic Flan Cake!

I’ve discovered another great cake recipe that I’m pretty chuffed about. This one is a surprisingly rich cake, given that it uses an entire dozen eggs, but it’s an amazing recipe that warrants being made at least once and definitely for a crowd!

The fun of this cake comes from it being two-layers baked all at once: chocolate cake on the bottom with amazingly dense & rich flan on top.

20130624-200804.jpg

You need to make this cake at least a day in advance because it takes quite awhile to bake, then be left to cool to room temperature and finally sit in the fridge to chill for at least another 8 hours, though overnight is preferable, for the flan to set properly.

Magic Flan Cake
Cake ingredients:
1/2 cup caramel sauce
1/2 cup + 2Tbsp flour
1/3 cup cocoa
1/2 tsp baking soda
1/8 tsp salt
4oz bittersweet chocolate
6 Tbsp butter
1/2 cup buttermilk
1/2 cup sugar
2 eggs
1 tsp vanilla

Flan ingredients:
2 cans sweetened condensed milk
2 1/2 cups milk
6 oz cream cheese
6 eggs + 4 egg yolks
1 tsp vanilla

Large kettle of boiled water for hot water bath

For the cake:
Preheat oven to 350F.
Grease 12-cup bundt pan & set aside.
Microwave caramel until easily pourable, about 30 seconds.
Pour caramel evenly into bottom of bundt pan.
Combine dry ingredients into bowl & set aside.
Combine butter & chocolate in large bowl and microwave until melted.
Whisk buttermilk, sugar, eggs & vanilla into chocolate mixture until incorporated.
Stir in flour mixture until just combined and pour batter over caramel prepared bundt pan.

Place cake pan in a large, deep, roasting pan & set aside to make flan mixture.

For the flan:
Process all ingredients in blender until smooth.
Gently pour flan mixture over cake batter.
Place roasting tray on oven rack.
Carefully pour hot water into roasting pan until it reaches halfway up side of bundt pan.
Bake 75-90 minutes, until toothpick inserted comes out clean.
Transfer bundt pan to wire rack and leave cool to room temperature, about 2 hours.
Refridgerate at least 8 hours for flan to set, preferably overnight.

To remove cake from bundt pan:
Place bundt pan in a large bowl of very hot water for about 1 minute.
Gently loosen the edges of cake with a small rubber spatula.
Invert cake onto large plate* & slowly remove pan, allowing caramel to drizzle over top of flan.

*A large ceramic quiche pan is the perfect vessel to serve the flan from, as the caramel sauce will have a lovely place to pool without losing any!

Official Cake of Summer – update!

This would seem to be strange admission, but it turns out that I do not own any plain, round, cake tins.

I may have, at one point, when The Hubbs & I first started purchasing all those supplies one needs when furnishing a first kitchen, but some years later I started purging the house of all things which we didn’t need or use, and round cake pans may have been one of those items.

Strangely, I have a decent, if embarassingly, large collection of NordicWare cast-aluminum cake, bundt & loaf pans which I love dearly and use regularly, but it would appear that I have nothing in the 8″-9″ range, which made me wonder, “How on earth am I going to make this darned cake again?!?!”

I realized this afternoon, while searching for a suitable pan to bake the Official Cake of Summer, that last year I was using disposable aluminum takeout containers lined with parchment to bake the cakes since the original purpose of the pans was to make instant frozen meals for future use. Silly me, I didn’t take into consideration that I may not have those takeout containers on hand in the future.

So that brings me to my current conundrum: what do I bake my favourite summer cake in?

Well, turns out, at the very least, I have two square pyrex dishes that should be able to stand in for my round cake tins as long as I remember to line them with a sheet of parchment paper, each. The thing is, I remember this recipe being quite scant, in the cake portion, bordering on frustrating, so I’ve decided to increase the recipe by 25% in hopes that it makes the entire recipe more manageable since a square cake pan also has a larger area to contend with, having corners to deal with and all. Cross your fingers that it works!

Official Cake of Summer: Strawberry Meringue Shortcake

155g very soft unsalted butter
5 eggs, separated
325g plus 1 teaspoon caster sugar
125g plain flour
30g cornflour
1 1/4 tsp baking powder
2 1/2 tsp vanilla extract
7 1/2 tsp milk
Handful Sliced, blanched almonds
250ml whipping cream
Strawberries, lots, sliced

Preheat oven to 200°C/390°F
Line two 9″ square cake pans with parchment and grease well. Set aside.
In a medium bowl, combine dry ingredients and set aside.
In a large bowl, cream butter with 125g sugar. Mix the egg yolks.
Add the flour mixture, then vanilla and milk and mix well.

Divide the mixture between the prepared tins. You will think you don’t even have enough to cover the bottom of the tins, but don’t panic. Spread calmly with a rubber spatula until smooth.

Whisk the egg whites until soft peaks form and then slowly whisk in remaining 200g of sugar.
Divide the egg white mixture between the two sponge-filled tins, spreading the meringue straight on top of the cake batter.

Smooth one flat and with the back of a spoon, peak the other and sprinkle the almonds over the peaks. Bake for 20-25 minutes.

With a cake-tester, pierce the cake that has the flat meringue topping to check it’s cooked all through. (It will have risen now but will fall back flattish later.) No sponge mixture should stick to the tester. Remove both cakes to a wire rack and let cool completely in the tins.

Unmould the flat-topped one on to a cake stand or plate, meringue side down.

Whisk the cream until thick but not stiff, add sugar to sweeten, if desired, and set aside.
Spread the flat sponge surface of the first, waiting, cake with the whipped cream and top with as many sliced strawberries as humanly possible, then top with the remaining cake, almond-studded meringue.

Happy Thanksgiving!

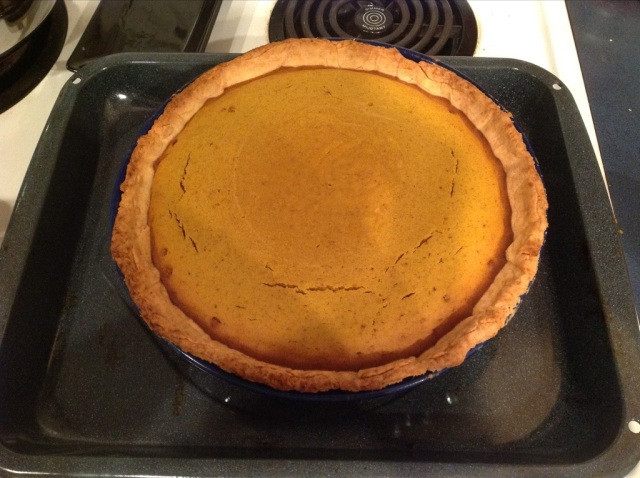
The original plans for my contribution to Thanksgiving dindin at my parents house was going to be little baby pumpkin pies made with my mini pie maker. Needless to say, I am having a tough time carrying out that plan because I am just so exhausted.

Yesterday was our goddaughter’s first birthday and we were more than happy to celebrate with her parents, as well as paternal grandparents last night over the birthday baby’s favourite meal: Indian take-out, believe it or not ^_^

She is a pretty adorable Iittle girl and as a wonderful surprise to everyone, she took her first real walking steps without holding onto anyone last night after dinner!

With the weather changing, the sun is going down again earlier every night and so my internal clock is totally whacked out. When we left for home last night, I thought it was about 930pm, when in fact it was only just about 845pm — not that it really mattered, the birthday girl was pretty much ready to call it a day by that point since she as starting to get the beginnings of a sugar crash from her birthday cake consumption anyhow.

By the time we got home, I was in pain, so there was Moose involved again, but I really didn’t want to go to bed just yet, so I ended up starting Project #Ranma! Amigurumi #2 — Pachirisu! once I was comfortably settled & cozy in bed at around 930pm.

By the time I woke up this morning, I felt pretty miserable — exhausted, more pain, groggy and just all around bleh. All the plans I had for making my baby pumpkin pies was pretty much gone and thrown out the window. I was going to make all the pastry cases today, have them rolled & cut out so they would be prepped for the Sunday morning bake-off and then in the afternoon I could do other things like roast the two spaghetti squashes we got from the CSA to bring for dindin. The plan was that I would just have to make the filling, bake eight to twelve little pies and then leave them alone for a few hours afterwards to make sure they had more than ample time to cool down before we packed everything up in my cupcake carrier to bring over to Mom & Dad’s for dinner at 6pm.

Sadly, my little pies won’t be accompanying us to dindin tomorrow, but instead, we will just be bringing one deep dish pumpkin pie. I was really looking forward to the idea of giving everyone their own pies, each served with a happy blob of whipped cream in the middle, or perhaps entirely covering the whole thing, depending on how each person wanted to enjoy their pie.

Maybe I will try and plan for mini pumpkin pies when we next play D&D since I have so much pumpkin purée in the freezer now — the grocery store ran out of canned pumpkin when I went shopping on Thursday, so instead of driving all over the place trying to find some, I decided to buy a Japanese pumpkin, roast it at home and purée it myself.

This was my first try at making a pumpkin pie from scatch-scratch and I am hoping that it will taste better than a store-bought pie or one made with canned pumpkin. It has to, right? It’s homemade!

The recipe I used was actually two Williams Sonoma pumpkin pie recipes that I combined together to make my own version of their deep dish spiced pumpkin pie recipe. The first recipe was for classic pumpkin pie which also includes the recipe for deep dish pie crust. The second recipe was for a spiced pumpkin pie and originally piqued my interest because it used fresh pumpkin, more spices and less sugar — all of which are bonuses, in my opinion.

If I used this recipe to make mini pumpkin pies, I don’t know how many pies you would get out of one recipe’s worth of pastry & filling. The recipe below is obviously for just the one deep dish pie, but should I ever get a chance to make them in mini pie form, I will update the recipe at the end.

The crust recipe below is supposed to be divided in half so you get two discs — one to be used to make the crust and the second to be used to make a whole shwack of pretty, decorative, pastry leaves to be used for the rim of the pie crust. You can do as you see fit. Personally, I will just use the dough at a later date for a second pie and am just chucking that second disc into the freezer until then.

One other note — I don’t own “pie weights” and I am of the opinion that using a whole pie’s worth of beans, lentils, rice or what have you, in place of said weights, is a shameful waste. I don’t know if people will take issue with what I’ve chosen to do instead, but what I just lined the crust wih a piece of parchment paper and then put a regular-sized glass pie plate on top. I baked the whole thing as per normally instructed for blind baking and it seems to have turned out perfectly fine. No useless pie weights floating around taking up space and no waste of perfectly good dried pantry staples. ^_^

Deep Dish Pumpkin Pie

For the filling:
2 cups pumpkin purée
1/4 cup maple syrup
1/4 cup firmly packed light brown sugar
1 Tbsp cornstarch
1 1/2 tsp. ground cinnamon
1 tsp. ground ginger
1/2 tsp. freshly grated nutmeg
1/4 tsp. ground cloves
3 eggs, beaten
1 cup heavy cream
1/3 cup milk

For the crust:
2 1/2 cups flour
2 Tbsp sugar
2 tsp salt
1 cup butter, cut into pieces
6-8 Tbsp ice water

Crust directions:
In a food processor, combine the flour, sugar & salt. Pulse to combine.
Add butter, pulse until the mixture resembles coarse meal.
Add 6 Tbsp ice water and pulse twice. If it’s still too dry, add 1 Tbsp more water at a time, pulsing twice after each addition.
Turn the dough out and divide in half. Shape each into a disk, wrap with plastic wrap & refrigerate for at least 2 hours.

When ready to bake, take the dough out of the fridge and let stand for 5 minutes.
Roll out one of the discs into a 12″ round and transfer to a 9-inch deep-dish pie pan.
Trim the edges as needed and make pretty edges if desired.

Preheat the oven to 400°F.

Line the piecrust with parchment paper and fill with pie weights and bake for 20 minutes.
Carefully remove the parchment and weights and bake about 5 minutes more. Transfer to a wire rack and let cool completely.

Meanwhile, reduce the oven temperature to 375°F.

In a small bowl, whisk together the cornstarch, cinnamon, ginger, nutmeg and cloves.
In a food processor, combine pumpkin, brown sugar and maple syrup. Add the spice mixture, eggs, cream and milk and whizz to combine.

Pour the filling into the prebaked piecrust and bake until the center is set, 60-65 minutes. You may need to consider covering the edges of the crust with aluminum foil after 30 minutes if they brown too quickly.

Transfer the pie to a wire rack and let cool completely, at least 2 hours, before serving.

20121006-220546.jpg

Official Cake of Summer

This Sunday was our annual family pancake breakky for Stampede — pancakes, bacon, cheese smokies & bavarian smokies, plus lots of berries because it’s summer and everything’s ripe.

Last week for family dindin, I promised Dad I would bring him a nice treat: strawberry shortcake!

This year we’ve had such a great haul of berries from our garden and surprisingly, we got a wonderful treat from our CSA that made it so that we had quite a lot of berries hanging around the house that needed using up before going off. If they went off, I would have been incredibly sad & upset at the loss, so I needed to do something fantastic and lo & behold Stampede Breakky was the perfect opportunity for me to use them.

Flipping through all my cookbooks that had potential shortcake recipes, I remembered that Nigella had a recipe in her Forever Summer book that I’ve always wanted to try, but I’ve never had the opportunity present itself until now and I was super thrilled to give it a go.

The recipe, as it’s written, I found it to be a bit much in the sweetness department. It’s way, way, WAY too sweet for my tastebuds, but with a bit of tweaking, I’m pretty sure this recipe will be my official Summer Cake of 2012.

In this cake, I’ve found that it’s the little things that absolutely make the recipe. Having a layer cake that already has its layers baked in, is a new experience for me. At a glance, it’s a 2-layer cake that has whipped cream and strawberries sandwiched in between, but in reality it’s actually four layers: each cake layer is comprised of a spongecake base and baked with a meringue layer on top.

I think this will now be my signature summer cake. Period. Honestly? I think it truly is the best summer cake in the world ^_^

20120718-190648.jpg
Strawberry Meringue Shortcake!

Strawberry Meringue Shortcake

125g very soft unsalted butter
4 eggs, separated
300g plus 1 teaspoon caster sugar
100g plain flour
25g cornflour
1 tsp baking powder
2 tsp vanilla extract
2 Tbsp milk
Handful Sliced, blanched almonds
250ml whipping cream
Strawberries, lots, sliced

Preheat oven to 200°C/390°F
Line two 21cm cake tins with parchment and grease well. Set aside.
In a medium bowl, combine dry ingredients and set aside.
In a large bowl, cream butter with 100g sugar. Mix the egg yolks.
Add the flour mixture, then vanilla and milk and mix well.

Divide the mixture between the prepared tins. You will think you don’t even have enough to cover the bottom of the tins, but don’t panic. Spread calmly with a rubber spatula until smooth.

Whisk the egg whites until soft peaks form and then slowly whisk in remaining 200g of sugar.
Divide the egg white mixture between the two sponge-filled tins, spreading the meringue straight on top of the cake batter.

Smooth one flat and with the back of a spoon, peak the other and sprinkle the almonds over the peaks. Bake for 20-25 minutes.

With a cake-tester, pierce the cake that has the flat meringue topping to check it’s cooked all through. (It will have risen now but will fall back flattish later.) No sponge mixture should stick to the tester. Remove both cakes to a wire rack and let cool completely in the tins.

Unmould the flat-topped one on to a cake stand or plate, meringue side down.

Whisk the cream until thick but not stiff, add sugar to sweeten, if desired, and set aside.
Spread the flat sponge surface of the first, waiting, cake with the whipped cream and top with as many sliced strawberries as humanly possible, then top with the remaining cake, almond-studded meringue.

Amazing… decadent… fudgey… mind boggling, really!

Saturday night, after I got back from the first backyard BBQ of the season, I decided that it was time to start the Cesamet again.

Instead of doing the “smart” thing regarding how to start the new meds, I chose to do the stupid method instead. You know, start at the lowest doseage and increase it a bit a week later. Don’t go for full on “kill an elephant” dose, it will generally make you feel a lot rougher when you wake up three days later…

Here’s the problem:

The Cesamet definitely doesn’t kill the pain, but it does make it so I can choose to ignore the pain (relatively easily) for a few hours if I want to, instead of taking The Moose which is actually kinda cool. Problem is that the pain will eventually make its appearance known under no uncertain terms and at that point I’d better be damned sure I have The Moose hanging around.

And in the end, it makes me an absolute Zombie…. or sleep like the dead… a vegetable… whatever. It’s almost impossible for me to wake up after I’ve had the Cesamet. I’ve had three, relatively decent, days worth of straight sleep which is sort of nice, but weird. Biggest problems: I didn’t get up to pee too often, I couldn’t (care to) get up to eat, I was pretty dizzy/unbalanced, I couldn’t wake up at all! I also fell asleep while talking on the phone with Mom without realizing I fell asleep. Basically this boiled down to being a bit of a worrisome experiment because if I had been left completely on my own, I probably would have slept for days without waking up to eat, drink or take my meds and The Hubbs is very much not a fan of me being so broken.

So we’re back at square one again… still stuck between a rock & a hard place in regards to how we deal with my pain & my pain meds.

*sigh*

So I made raspberry jam brownies.

They were supposed to be for The Hubbs’ work snacks, but I was craving chocolate & raspberries and may have actually eaten a whole slice all by myself, still hot from the oven, with a scoop of vanilla ice cream. I don’t crave desserts too often, but I’m pretty sure that the Cesamet may have contributed some cravings I had over the last two nights.

This brownie recipe is wonderfully simple and it requires no butter or eggs, something I would never have imagined myself trying to make. In the world of baking, I am one of those girls happily encouraging the full use of butter, sugar, eggs and cream to make a proper tasting dessert. The thought of desserts not incorporating any of these ingredients generally confuses me, so you can imagine my delight (and relief) that this recipe worked when I pulled the brownies out from the oven.

The nifty thing about this recipe is that you can take any jam you might have lying around, mix it into the brownie batter until smooth (or as smooth as possible if your jam is dense with fruit) and doing this gives you an incredibly fudgey brownie with the most amazing fruit flavour. Not only that but if you wait just long enough for things to set up just slightly after removing from the oven, you can eat the brownies still warm with a scoop of vanilla ice cream & be the happiest clam on the planet.

Jam Brownies
1 cup dark chocolate chips, divided
1 jar (250ml+) raspberry jam
1/4 cup milk
3/4 cup sugar
1/2 cup canola oil
1 tsp vanilla
1 1/2 cups flour
1/4 cup cocoa
1/4 tsp baking powder
1/2 tsp baking soda
1/4 tsp salt

Preheat oven to 325F
Line 9×9″ pan with parchment & set aside.
Melt 1/2 cup chocolate chips in the microwave, stirring every thirty seconds until melted. Set aside to cool.
In a large bowl with a whisk, combine the jam, milk, sugar, oil and vanilla. Stir well, until smooth(-ish).
Add the flour, cocoa, salt, baking powder and baking soda. Mix well, then add the cooled melted chocolate.
Fold in remaining chocolate chips, then spread batter out into lined pan and bake for 45 minutes.

When the time is up, the brownies will not appear to be done but take them out anyway and let them cool for 30-45 minutes…. Or just wait long enough for the sides of the cake to set up, after being cut into pieces, and serve still hot with a scoop of vanilla ice cream.

Side Note: These brownies were originally a Vegan recipe, adapted, but can also be GLUTEN-FREE! If you want the GF version of the recipe, check it out, here.

Tiramisuuuuuuuuuuuuuu!

Oh Tiramisu, how I’ve missed you.

Wow, I didn’t realize how many desserts I’ve been making over the last three weeks or so.

I probably should have considered writing up the Chinese Braised Pork recipe first, but I promised a friend that I would post the recipe for tiramisu for her and I’ve already left it a lot later than I had intended.

I used to make tiramisu two to three times a year but then I stopped. I also used to make the tiramisu booze-free because I happened to quite like not feeling absolutely horrific the next day.

Tiramisu always seems to have this air of complexity to it, when in fact it’s really damn easy and is completely no-cook, to boot! The only thing with tiramisu is that it tastes so much better if you give it time to sit and hang out. I prefer to make it the day before and let it sit overnight in the fridge so the layers can do their thing.

Tiramisu!

Like I said, the recipe is just ridiculously easy. The nice thing about tiramisu is that you can choose what kind of alcohol you want to use for flavouring, so if you don’t like what I’ve chosen, then by all means use whatever you have on hand.

This recipe makes enough to serve 8 people. Happily. Twice. With leftovers.

Tiramisu
2 eggs
2 egg yolks
12 Tbsp sugar, divided
500g tub mascarpone cheese
1 cup heavy whipping cream
1/2 cup marsala wine
2 Tbsp kahlua
2 cups hot espresso (or strong coffee)
2 pkgs lady fingers (~48 cookies)
cocoa or dark chocolate for dusting/grating overtop

Combine eggs, yolks & 8Tbsp sugar in a bowl and whisk until almost soft peaks form, then whisk in mascarpone until smooth.
In separate bowl, whip cream with 2Tbsp sugar until stiff peaks form.
Add whipped cream to cheese mixture, mix until smooth, then add kahlua.
Combine the espresso, 2Tbsp sugar, marsala wine in a wide, shallow bowl and stir to dissolve sugar.
When ready to assemble tiramisu:
*Quickly dip lady fingers, one at a time, into coffee and place in a 9×13″ glass casserole dish until bottom is covered.
*Evenly spread half the mascarpone mixture over the biscuits.
*Repeat with another layer of biscuits and the remaining mascarpone.
*Refridgerate at least 8-10 hours, preferably overnight.
*Dust top of tiramisu with cocoa or grated chocolate just before serving.

More recipes, more chocolate cake.

A couple weeks ago, for D&D night, I made a chocolate cake.

My original intention was actually to make banana cakie, at The Hubbs’ request, but somehow or other I stumbled upon a recipe for Chocolate Banana Buttermilk Cake in the free Spring 2012 Inspired magazine from Sobeys that gets sent to me in the mail every few months. I can’t remember how I went from intending to bring a banana cake for D&D, to making it into a chocolate-banana cake instead, but it was a brilliant decision.

Unrelated side note: I discovered that they have an app which you can download the magazine straight to your iPad. The only disappointment to the app I’ve discovered is that you can’t save/bookmark any of the recipes should you want to keep them. On the other hand, it appears that you can create a recipe box account on the Sobeys website… it’s just not ~my~ favourite means of keeping recipes and I would much prefer the ability to like I said, bookmark the recipe in the app.

This cake, was amazing.

Side rant: I don’t like adding chocolate to recipes just because it wasn’t a chocolate cake to begin with. If I am going to make a chocolate cake, I am going to make a chocolate cake. If I make a cake with chocolate in it, I want the chocolate to be a major component to the recipe. Tossing in a handful chocolate chips just to call it a ‘________-chocolate cake’ does not make for a tasty cake, in my opinion. I hate it when recipes add chocolate chips willy-nilly just to make it more appealing and supposedly tastier. I am quite happy NOT eating chocolate. In fact, I will go so far as to say I actually prefer cakes which do not have chocolate in them at all.

Chocolate does not always make everything better… same thing goes with bacon. There, I said it!

Now, back to my cake.

First off: a note about my accidental screw up. When I’ve made a mistake in the past it’s been pretty major, in my opinion, and yet somehow my screw ups don’t usually render the recipe into completely inedible garbage-fodder… at least it hasn’t yet. *knock on wood*

The description of the cake given in the magazine is, “This is big. Really big. We pared down the fat and calories while keeping all the chocolatey charm. (220 calories per slice!) So go on – ready your forks and spoons (or fingers) and enjoy!”

Long story short: I was multi-tasking. I was talking on the phone while I was getting my ingredients all lined up and ready to go so I could just dump everything into my mixer as it was running… all while Moosed up. While I was talking, I was thinking to myself that I much prefer using butter in my cakes than oil, so I melted down half a cup of butter and set it aside to cool while I prepared the remaining ingredients.

Now imagine this scene being played out: Everything’s going fine and dandy, you’re following the instructions, following the instructions and then you turn to face the stove to see if the oven has preheated and you see the cooled melted butter sitting on the stove. Think that you’ve forgotten to add the oil to the cake batter, so you go ahead and pour in the melted butter. It’s slightly out of sequence from the instructions, but oh well, at least you’re adding it, right? You mix well, and then you stop. You remember that you already added the oil at the beginning of the recipe and suddenly realize that you’ve now doubled the fat component to your recipe for some inexplicable reason. You do deer in headlights and panic for a moment. You breathe again, cross your fingers and continue on as if nothing has gone wrong.

Let’s just say that the description of the cake above, from the magazine, is no longer applicable if you choose to follow my screwed up version of the recipe that I am going to present to you below. Like, not even close ¬_¬;;

Quickly, a couple of the changes I made to the recipe: swapped lemon yoghurt for buttermilk, omitted the glaze since the cake is more than rich enough as is, accidentally doubled the fat content because I was totally not paying attention to what I was doing and then totally forgot what I had already added to the mixing bowl. Ya. Rly. Just so you know, this cake is rather awesome with those changes ^_^

Interesting discovery of note: If you freeze bananas because they get way too ripe before you could eat them, make sure to freeze them in a ziplock baggie so that when you thaw them, they don’t goo everywhere. Believe me when I say these things are SLIMY when they thaw out! It’s really rather gross. You don’t even really need to peel it once it’s thawed, just cut the tip off one end and squeeze the banana out like a tube of toothpaste… *shudder*

Ridiculously Rich Chocolate-Banana Cake

2 1/2 cups flour
1/2 cup cocoa
1 1/2 tsp baking soda

1 1/2 cups lemon yoghurt (I LOVE Liberté brand)
1/2 cup oil
1/2 cup butter, melted
2 cups brown sugar
3 eggs

1 Tbsp vanilla

3 large ripe bananas, thawed if frozen
2 tsp lemon juice
1/2 cup chocolate chips

Preheat oven to 375°F
Grease and flour a bundt pan and set aside.
Mix together flour, cocoa & baking soda in medium bowl and set aside.
In bowl of stand mixer beat together oil, butter and brown sugar until light and fluffy.
Add eggs, one at a time, then vanilla.
Add lemon juice, then one slimy banana at a time… watching with horror as it comes sliding out of its skin with a *splort!*
Mix well between each banana until batter becomes smooth.
Blend in half the flour mixture and half the yoghurt, then remaining flour and yoghurt.
Stir in the chocolate chips then pour batter into prepared pan.
Bake about 50-55 mins or until skewer comes out clean when tested.
Cool in pan before turning out onto plate.

Yay! You just made a chocolate-banana cake that tastes pretty darned swell ^_^

So many recipes, so little time… and 2-Minute Chocolate Cake!

I have made so many awesome meals the last couple of weeks and I haven’t posted any of them here.

I have been wanting to write for ages, but the last two weeks have just been an absolute gong-show. *sigh*

Well, to start things off in what is I am sure to be an onslaught of recipes to come, have some chocolate cake ^_^

I figured I should share the love for the two-minute chocolate cake since it was kindly pointed out to me that I actually have the recipe on-hand at home to do so… silly me.

2 Minute Chocorate Cakie!

For a generous single-serving of cake, this is your recipe — though we discovered last night after a very rich meal that the recipe is actually more fitting for two, post dinner ^_^

Two-Minute Chocolate Mug Cake

(from Lucky Peach Magazine Issue 3)

1 egg

3 Tbsp milk

3 Tbsp oil

3 Tbsp flour

4 Tbsp sugar

2 Tbsp cocoa powder

3 Tbsp chocolate chips

splash of vanilla

pinch of salt

Microwave safe coffee mug

Add egg + wet ingredients to mug and stir well.

Add dry ingredients & mix again thoroughly.

Add chocolate chips, vanilla & mix again on more time.

Microwave for 2 minutes, allow to cool, then EAT!

P.S.: The cake WILL rise over the top of the mug, but don’t be afraid! ^_^

P.P.S.: This can also be done with gluten-free flour mix instead of regular flour.